This blog has moved! Visit me in my new space: This Little Home of Mine

October 28, 2015

Fruity Tooty Whip

One of our favorite go-to treats is Fruity Tooty Whip.
Fruity Tooty Whip

How do we make it?

We start by putting a large dollop of Cool Whip in the bottom of a small bowl...
then we top with fruit!

Any kind of fruit goes, and it is perfectly delicious every single time!

For an added touch, top the fruit with crushed graham crackers. This seems to be the perfect addition especially if you have any strawberries or bananas in your fruit mixture. 

Enjoy!


October 19, 2015

Crispy Chicken Garden Salad

This Crispy Chicken Garden Salad is a simple meal idea that is perfect for hectic lunchtimes and busy weeknights!


If you've followed along with me for long, you know I like to keep my recipes simple! 
Many of them take on a semi-homemade approach - With that being said, feel free to use a bagged salad mix as your base for this recipe. Sometimes I do...and sometimes I don't...

Either way, I like to add lots of extra veggies - carrots, broccoli, cheese (oh wait, that's not a vegetable), cucumbers, green onions, etc. 

For the chicken, sometimes I use seasoned grilled chicken that I've made at home in my crockpot; but sometimes, I use crispy chicken purchased from one of our favorite local restaurants.

Lazy? I like to think of it as being resourceful. *smile*

Avocado and Boiled Egg? Sure! Add those, too, and then serve with your favorite dressing!


October 14, 2015

4 Books for Moms

If I could recommend a handful of books for you, my fellow mamas, the stack of reads would look something like this:

This book is a great read for any mom! It address so many issues that we as women/moms face every day, and I know any mom who reads this will be encouraged and challenged. Last summer, I blogged some of my thoughts about what hands-free looks like in our house.

This book was a game-changer for me and would absolutely benefit any mom - no matter her stage or the age of her children. A little hope can go a long way!

Notice a theme here? Yes, lots of Sally Clarkson! I love her wisdom...I love her heart for motherhood....I love her passion for being fully committed to our homes and our families. If you have never read one of her books, I would strongly encourage you to spend some time with this seasoned mom - I promise you will walk away with a fresh perspective.

October 7, 2015

How to Make Your Own Crayons

Pinterest has this ability to convince us that we just might start carrying out these intricate and extravagant and amazing activities with our kiddos...but listen, don't pin ideas that you'll never do...pin the gems that are easy to implement...things you can do with stuff you already have on hand.

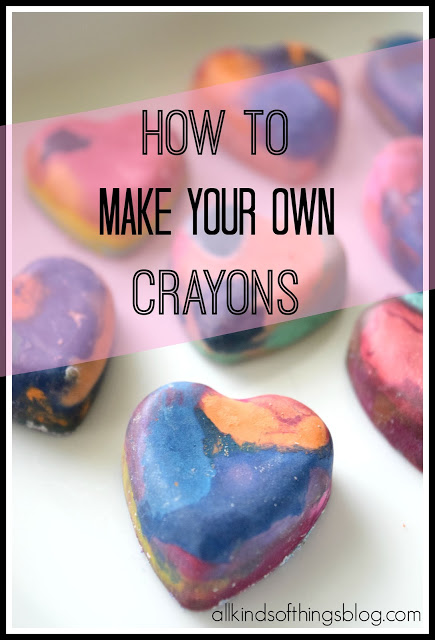
For example, check out how we made our own crayons!

I had spotted this idea on 
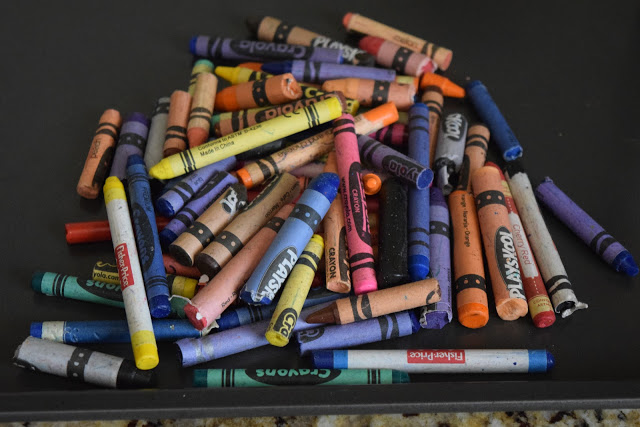
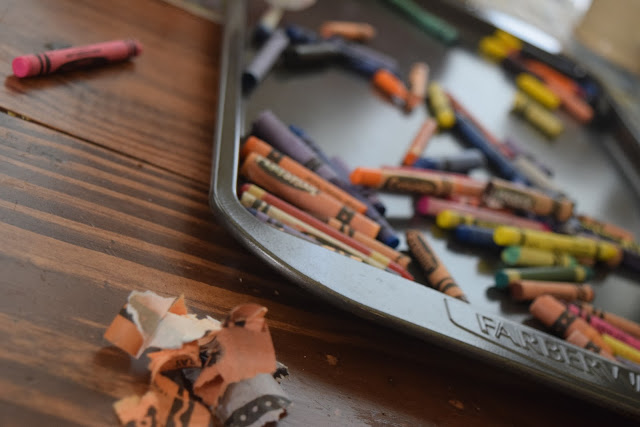
Pinterest some time ago, so over the course of several months, I collected our old, broken, junky crayons. (Yes, those of you who know about my fear of clutter are probably shocked I held on to them!)


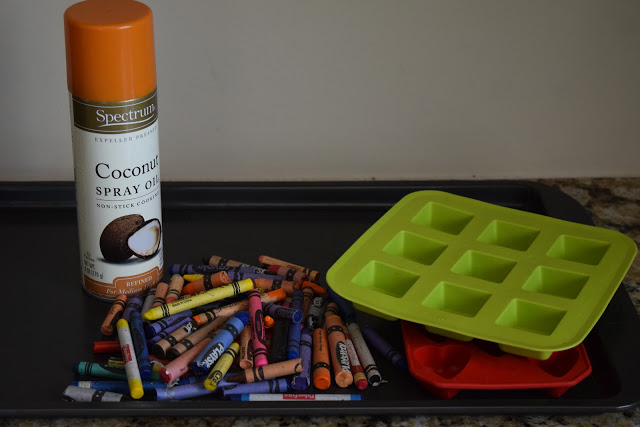
When I felt I had gathered enough crayons (a sandwich size Ziploc bag full), I decided it was time to do this project. I rounded up a cookie sheet, a couple of silicone molds, and some cooking spray.

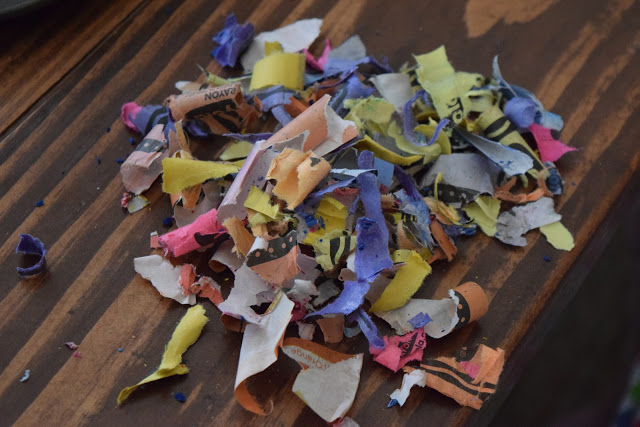
Then I got my crew together and enlisted their help! Their job was to peel all of the paper off of the crayons. I had a feeling they would get bored with this and I would be left to do the job myself, but they actually had a great time with this step. 

We had quite the mess on our hands, but my kiddos were excited to see what we were going to do next.

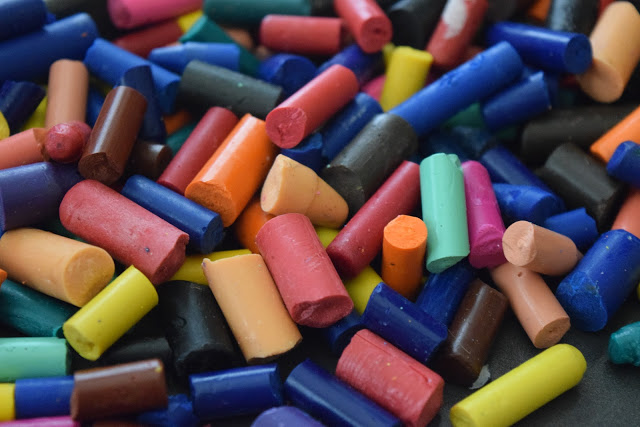
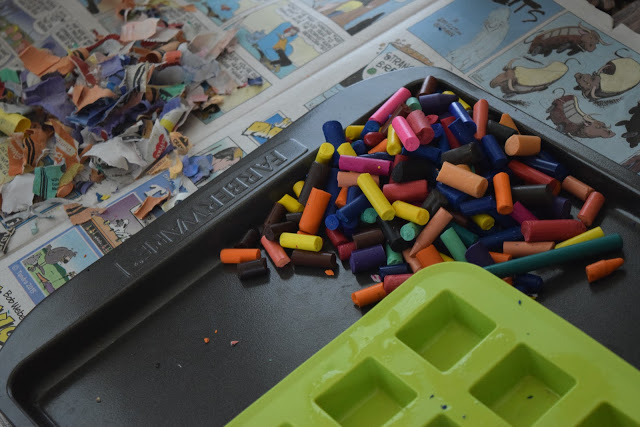
Daddy helped us break the crayons into to smaller piece - approximately 1 inch pieces and smaller.


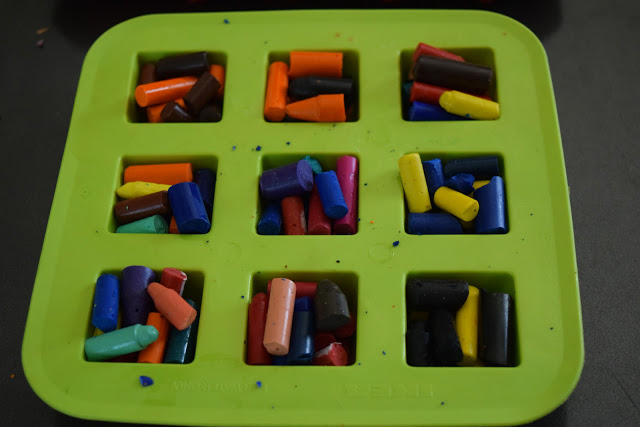
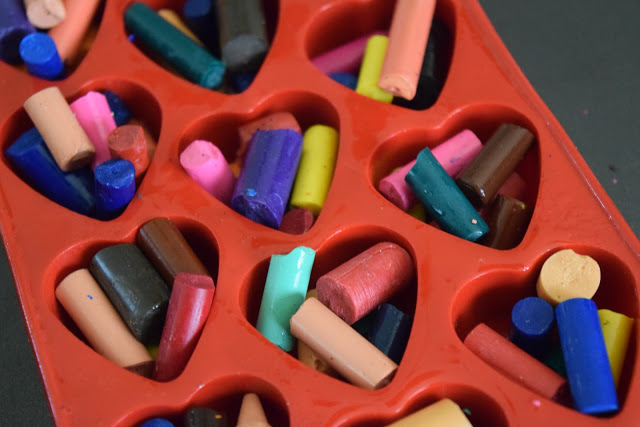
Then we sprayed our molds with cooking spray (I've been told you definitely don't want to forget this step!) and started filling the molds with crayons...

...making sure to include a fun variety of colors in each section.

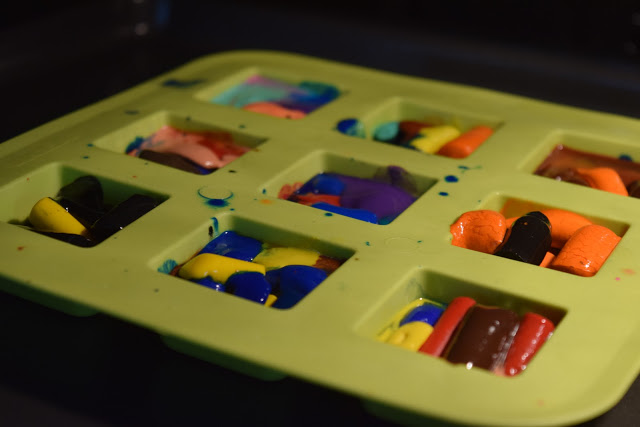
Then we placed the molds on the cookie sheet and popped them in the oven.

We let them bake at 300 degrees for approximately 20 minutes. This was much longer than some of the pins I had found recommended. I think it depends on your molds...and your crayons...and your oven...etc.

When it looks as if the crayons were mostly melted (soupy in appearance), we pulled the tray out of the oven and allowed them to cool on the counter (away from little hands!). 
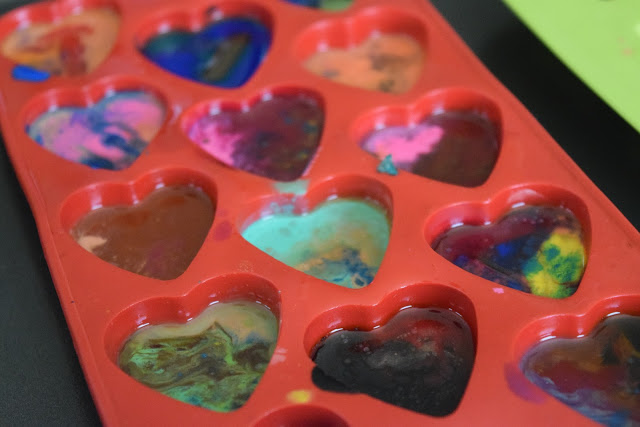
We left them there until they had hardened. 
You could also place your molds in the fridge once they have cooled a bit.

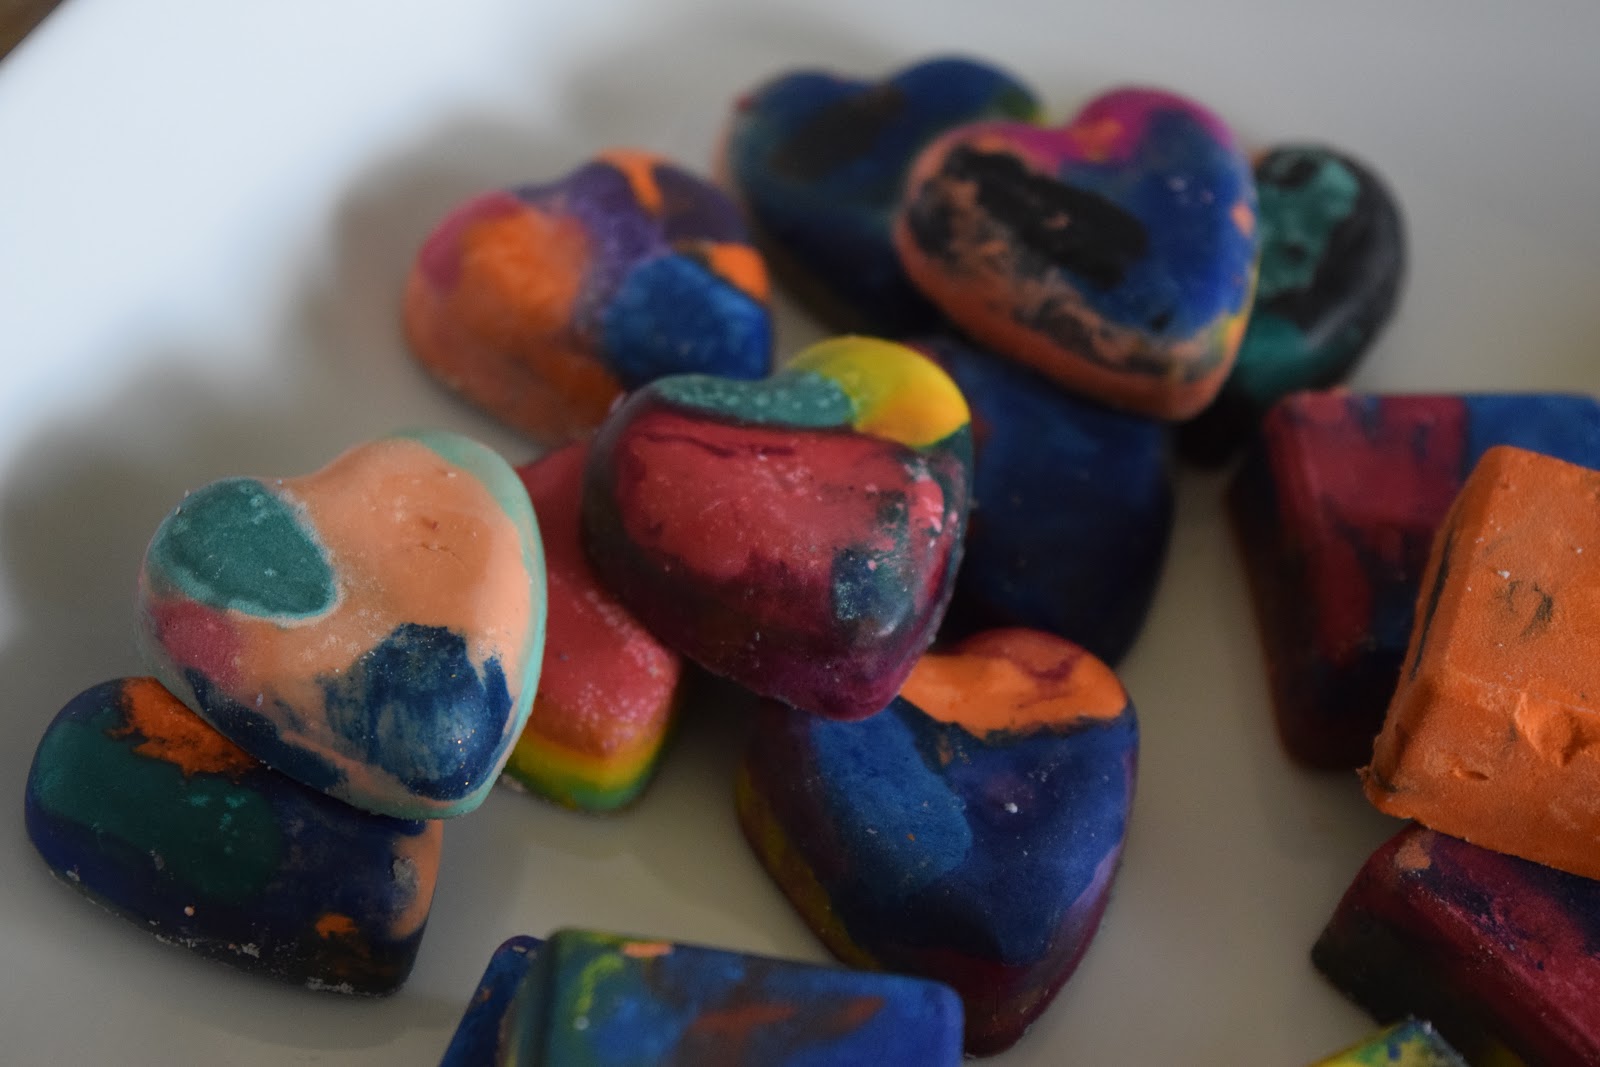
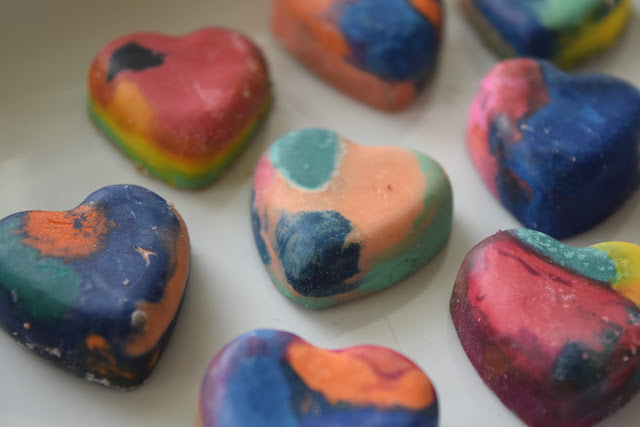
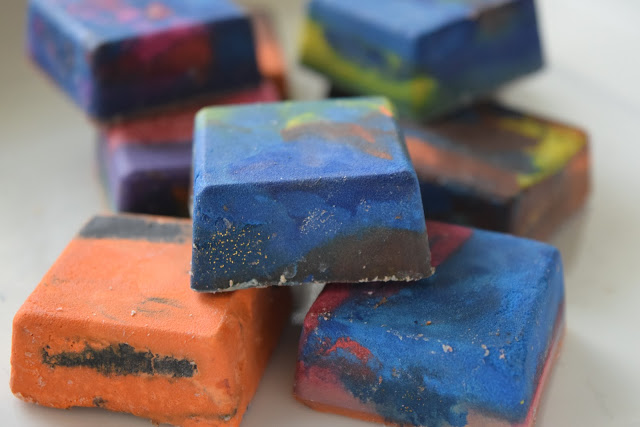
Once they had hardened, we popped our new crayons out of the molds...

...and they were gorgeous!

We couldn't help but start coloring with them right away!

Note: Make sure your silicone molds are oven safe. It seemed that one of our was, but one of ours technically wasn't - so just a heads up on that. Also know that your molds may be permanently stained...but we figure we will just use them to make more crayons in the future.

October 5, 2015

Ice Cream Cookie Sandwiches

Few sweet treats are easier to put together than these simple Ice Cream Cookie Sandwiches!

Begin by baking a batch of cookies! To keep it simple, try a pre-made cookie dough. 
We love the break-and-bake cookies by Pillsbury, but you may feel strongly about making your own.

After your cookies are baked to perfection, pull out the icecream.
(We love Breyers!)


Please a couple of tiny scoops of ice cream on one cookie...

...and then place another cookie on top.

Perfection.